Creating .silo files with pyvisfile
Silo is an I/O library developed at LLNL for reading/writing scientific information – databases or simulation data, for example – in a standardized format that facilitates data exchange and interfacing of different software tools. Silo files are also the default input format for the visualisation program VisIt, which was also developed at LLNL.
For installation instructions on moonlight, click here
Installation of pyvisfile and its dependencies
Silo
First we need to install Silo, if it is not already installed.
If you are running Debian/Ubuntu you can install the Debian package:
$ sudo apt-get install libsiloh5-0 libsilo-dev libsilo-bin
or if you are a Mac user you can install Silo with homebrew:
$ brew install silo.
Alternatively, if you prefer to build from source, you can download the source here.
Here’s how I built from the source (of course, you will need to change the path
for where you want silo to be built and to point to the correct hdf5 lib and
include directories):
# set a Silo environment variable for ease later on
$export SILO=/home/swj/softs/silo/silo-4.10-bsd/build

# configure and build
$ ./configure --prefix=$SILO --enable-pythonmodule \
--with-hdf5=/usr/lib/x86_64-linux-gnu/hdf5/serial/include,/usr/lib/x86_64-linux-gnu/hdf5/serial/lib
$ make
$ make install
The software comes with a python module that is build if configure is given
the --enable-pythonmodule flag, as in the example above, which ends up in
$SILO/lib. The module seems to work but it has little documentation
(actually, I couldn’t find any at all) and no doctrings, and does not appear to
have all of the functionality that I had expected. Instead, I opted to use
pyvisfile (which is actually recommended by the Silo developers as a superior
alternative to the python module that they provide).
pyvisfile requires, in addition to silo, Boost and
PyUblas. Here’s how to install
them, and finally, pyvisfile:
Boost
PyUblas and pyvisfile require C++ libraries from Boost.
On debian/ubuntu you can install the Boost Debian package:
$ sudo apt-get install libboost-all-dev
or if you’re a Mac user you can install using homebrew:
$ brew install boost
$ brew install boost-python
Alternatively, you could build from the source, which I have not tried myself.
PyUblas
PyUblas is another utility by Andreas Kloeckner. It provides an interface between NumPy and Boost.Ublas (the Basic Linear Algebra Library provided by Boost) for use with Boost.Python (a C++ library enabling interoperability of C++ and Python).
Firstly, we’ll need to clone Kloeckner’s PyUblas repo:
$ git clone http://git.tiker.net/trees/pyublas.git
Next, we need to configure it with our Boost installation.
You’ll notice that when I installed Boost on Mac using homebrew, I installed a package called boost-python as well, that provides the library
libboost_python. For this reason and because I’m not a sudoer on my Mac I had to configure PyUblas slightly differently on each machine, so I’ve just included both options here
debian:
$ ./configure.py --python-exe=python --boost-inc-dir=/usr/include/boost \
--boost-lib-dir=/usr/lib/x86_64-linux-gnu/lib --boost-compiler=gcc
Mac:
$ export BOOST=/Users/swjones/softs/brew/Cellar/boost/1.64.0_1
$ ./configure.py --python-exe=python --boost-inc-dir=$BOOST/include \
--boost-lib-dir=$BOOST/lib --boost-compiler=gcc \
--boost-python-libname=boost_python
note that if you are still having trouble to compile, you can run ./configure
--help to see the default configuration options, that may not be correct for
your system.
now we can build and test PyUblas:
$ make
debian:
$ sudo make install
$ cd test
$ python test_pyublas.py
Mac:
$ make install
$ cd test
$ python test_pyublas.py
pyvisfile
Now we are ready to install pyvisfile.
Clone pyvisfile git repo:
$ git clone git@github.com:inducer/pyvisfile.git
and configure it, and then build (again, I have separated out configuration options that I used on Debian vs Mac, but the differences are mostly system-dependent rather than OS dependent):
debian:
$ ./configure.py --use-silo --silo-inc-dir=$SILO/include \
--silo-lib-dir=$SILO/lib --python-exe=python \
--boost-inc-dir=/usr/include/boost \
--boost-lib-dir=/usr/lib/x86_64-linux-gnu/lib --boost-compiler=gcc
$ make
$ sudo make install
Mac:
$ export BOOST=/Users/swjones/softs/brew/Cellar/boost/1.64.0_1
$ ./configure.py --use-silo --silo-inc-dir=$SILO/include \
--silo-lib-dir=$SILO/lib --python-exe=python \
--boost-inc-dir=$BOOST/include \
--boost-lib-dir=$BOOST/lib --boost-compiler=gcc \
--boost-python-libname=boost_python
$ make
$ make install
Again, note that if you are still having trouble to compile, you can run
./configure
--help
to see the default configuration options, which may not be
correct for your system.
Finally (depending on how you like to do/have done things), you may need to append
pyvisfile and pyublas to your PYTHONPATH.
creating silo files: examples
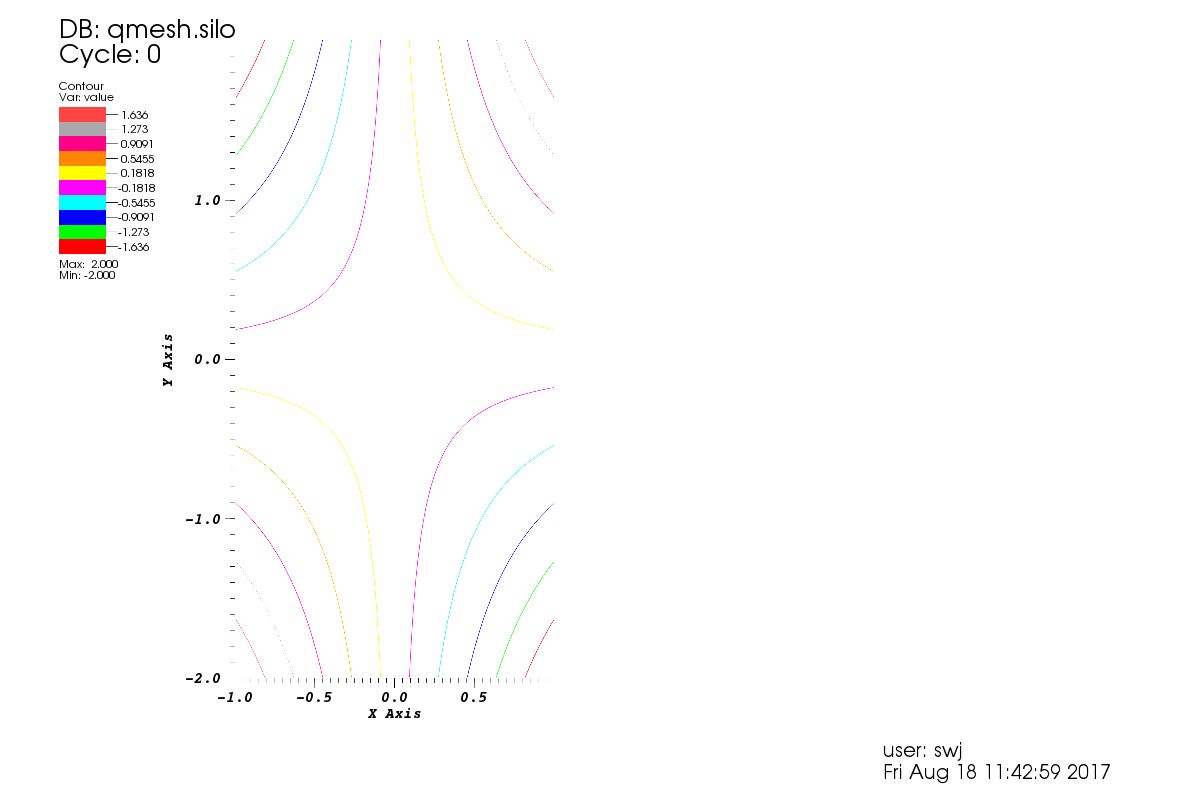
Andreas Kloeckner provides some useful examples in his repository for pyvisfile for how to write silo files. Here is one that creates a 2D mesh with some scalar quantity:
# modified from original code by Matthieu Haefele (IPP, Max-Planck-Gesellschaft)

import numpy
import pyvisfile.silo as silo

f = silo.SiloFile("qmesh.silo", mode=silo.DB_CLOBBER)
coord = [
        numpy.linspace(-1.0,1.0,50),
        numpy.linspace(-2.0,2.0,100)
        ]

f.put_quadmesh("meshxy", coord)

value = coord[0][:,numpy.newaxis]* coord[1][numpy.newaxis,:]

f.put_quadvar1("value", "meshxy", numpy.asarray(value, order="F"), value.shape,
        centering=silo.DB_NODECENT)

f.close()
This seems to work wondefully, and I was able to load the new file qmesh.silo
straight into VisIt and make the contour plot below. Thank you very much
Andreas Kloeckner.